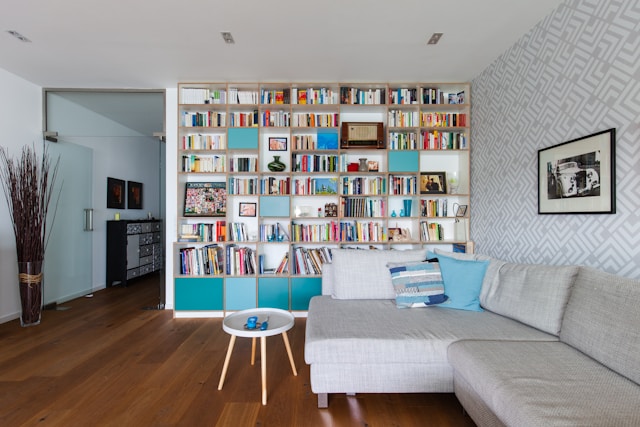
A custom bookshelf is a great way to add personality and functionality to your home. Whether you need extra storage or want a stylish focal point, a DIY bookshelf can be tailored to fit your living room perfectly. In this guide, we’ll walk you through the process of planning, building, and finishing a home storage solution that complements your space.
Planning and Design
Before you start cutting wood, take time to plan your custom bookshelf to ensure it fits your living room space and style.
- Measure the Space – Use a measuring tape to determine the width, height, and depth of your bookshelf. Consider nearby furniture and wall outlets.
- Choose Materials – Popular wood options include plywood for affordability or solid hardwood for a premium finish.
- Select a Style – Decide whether you want a built-in look, a freestanding unit, or a ladder-style bookshelf.
- Sketch a Design – You can hand-draw your bookshelf layout or use design software for precision.
Materials and Tools Needed
Materials:
- Plywood or solid wood panels
- Screws and wood glue
- Sandpaper
- Primer, paint, or wood stain
- Brackets (optional for support)
Tools:
- Saw (circular or table saw)
- Drill and screwdriver
- Measuring tape
- Level
- Paintbrush or roller
Cutting and Assembling the Bookshelf
- Cut the Wood Panels – Using a saw, cut the wood to match your design measurements. This includes side panels, shelves, and a back panel if needed.
- Assemble the Frame – Attach the side panels to the top and bottom pieces using wood glue and screws.
- Add the Shelves – Secure the shelves at equal distances or adjust based on your storage needs. Use a level to ensure they are straight.
- Reinforce the Structure – Add brackets or a back panel for extra support, especially for taller bookshelves.
Sanding, Painting, and Finishing
- Sand the Surface – Use fine-grit sandpaper to smooth rough edges and surfaces.
- Apply Primer and Paint/Stain – If you prefer a painted bookshelf, apply a primer first, then coat it with your chosen color. For a natural wood finish, use a stain and sealant.
- Let It Dry – Allow the bookshelf to dry completely before moving it into place.
Installation and Final Adjustments
- If your DIY bookshelf is tall or heavy, secure it to the wall with brackets to prevent tipping.
- Adjust shelf heights if necessary to accommodate larger books or decorative items.
- Organize your bookshelf with a mix of books, plants, and decorative pieces for a balanced look.
Conclusion
Building a custom bookshelf is a rewarding woodworking project that enhances both the storage and aesthetic of your living room. By following this guide, you can create a home storage solution that suits your needs and style. Whether you’re a beginner or an experienced DIYer, this project is a great way to add a personal touch to your home.