Gone are the days when professional photography required expensive cameras. Today, smartphones come equipped with powerful cameras that can capture stunning images—if you know how to use them correctly. Whether you’re taking photos for social media, your business, or personal memories, mastering smartphone photography can make a huge difference. Here’s how to take high-quality photos with just your phone.
Understanding Your Smartphone Camera
Before you start snapping pictures, take some time to explore your phone’s camera settings. Many smartphones offer features that can dramatically improve your shots:
- Adjust the resolution to the highest setting for sharper images.
- Turn on gridlines to apply the rule of thirds and improve composition.
- Use HDR mode for balanced exposure, especially in high-contrast scenes.
- Tap to focus and adjust exposure by dragging the brightness slider up or down.
Lighting Techniques for Better Photos
Lighting is one of the most important factors in smartphone photography. Here’s how to use it to your advantage:
- Natural light is best. Shoot outdoors or near a window for soft, flattering light.
- Golden hour (sunrise and sunset) provides warm, diffused lighting that enhances photos.
- Avoid harsh midday light that creates strong shadows and overexposure.
- Use artificial lighting strategically, such as a ring light or soft LED for better portraits.
Composition Tips for Stunning Shots
A well-composed photo can instantly look more professional. Keep these composition techniques in mind:
- Rule of thirds: Position your subject off-center using gridlines for a balanced composition.
- Leading lines: Use roads, fences, or pathways to guide the viewer’s eye into the image.
- Framing: Use natural elements like doorways or trees to create an interesting frame around your subject.
- Symmetry and negative space: Keep backgrounds clean and simple to make your subject stand out.
Mastering Smartphone Camera Features
Most modern smartphones come with features that can elevate your photography:
- Portrait mode blurs the background for a professional-looking depth effect.
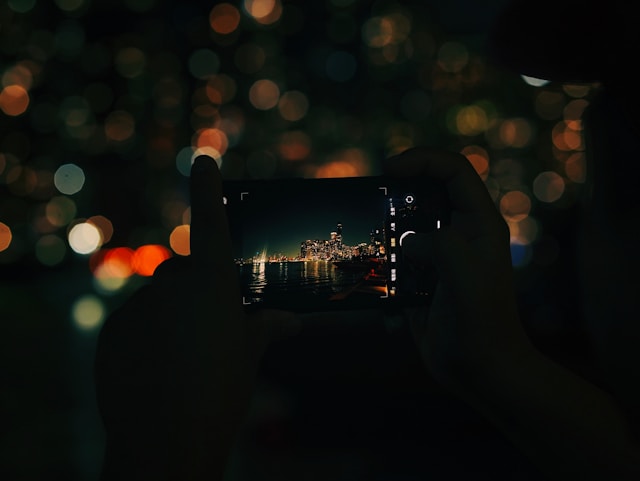
- Night mode allows for clearer low-light photos without flash.
- Pro mode lets you adjust settings like ISO and shutter speed for more control.
- Burst mode helps capture fast-moving subjects by taking multiple shots in quick succession.
Editing Like a Pro
Photo editing can enhance your images and give them a polished look. Some of the best editing apps include:
- Adobe Lightroom Mobile – Great for adjusting brightness, contrast, and colors.
- Snapseed – Offers professional-level editing tools with an easy-to-use interface.
- VSCO – Popular for its stylish filters and manual adjustments.
When editing:
- Avoid over-filtering—keep colors and tones looking natural.
- Adjust brightness and contrast to enhance details.
- Use the sharpening tool sparingly to avoid grainy images.
Avoiding Common Mistakes
Even the best smartphones won’t produce great photos if you make these common mistakes:
- Overediting: Too many filters and unnatural effects can ruin a photo.
- Poor lighting: Always ensure your subject is well-lit, avoiding harsh shadows.
- Shaky hands: Use both hands or a tripod for stability.
- Cluttered backgrounds: Keep the scene simple to maintain focus on the subject.
Conclusion
Taking professional-looking photos with your smartphone is all about technique, not expensive equipment. By understanding your camera settings, using proper lighting, mastering composition, and applying subtle edits, you can capture stunning images effortlessly.